How to Resize an Image
Warning: the size of a recipe picture in My Recipe Manager is limited to 25KB. If you don't know how to resize an image we have placed a link to a free web utility and instructions on how to resize your image on the form where you create new recipes. These instructions are also detailed below.
There are several reasons why resizing images is important:
- Images can account for more than 50% of the web page size in general so it makes sense to optimise and resize them to make website and application pages load faster.
- Images can consume large amounts of data within an application. Limiting recipe pictures to 25KB assists in maximising data usage which in turn assists us to keep our subscription fees lower than if we were to allow much larger images to be used.
If you already use software like Adobe Photoshop or Paint Shop Pro which can resize images then you can resize your recipe pictures like you would do with any other picture.
If you don't use any imagery software or you don't know how to resize an image there are image utilities on the internet that can be used free of charge. The below instructions use one of these free utilities:
Note: this process requires you to have an internet connection.
- Click on this link to open ImageResizer.com
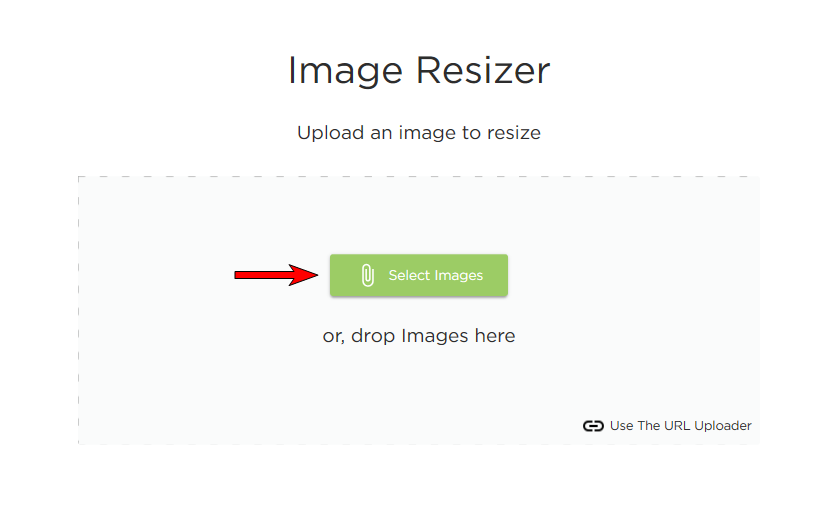
- Select and upload your image (refer to the image below).
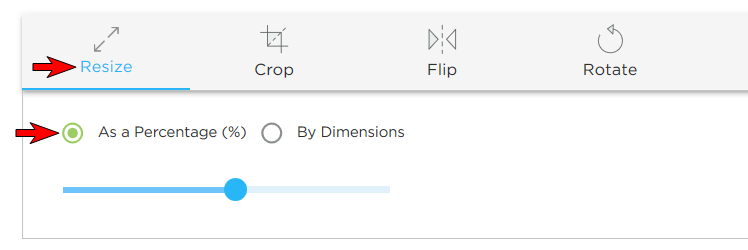
- Ensure 'Resize' and 'As a Percentage (%)' is selected (refer to the image below).
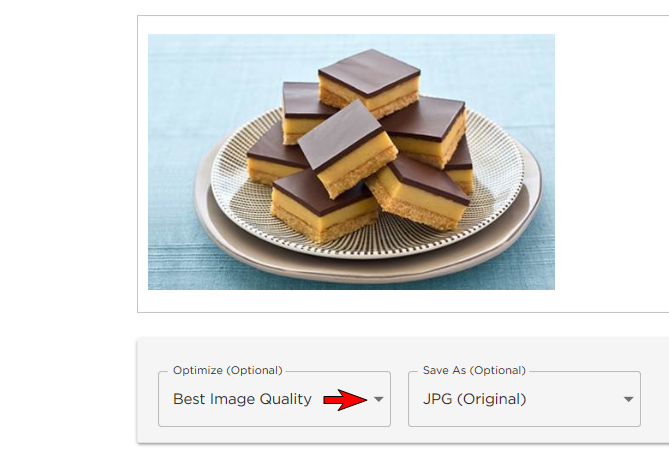
- Select the drop down arrow for 'Optimize (Optional)' and change it from 'Best Image Quality' to 'Set Max File Size' (refer to the image below).
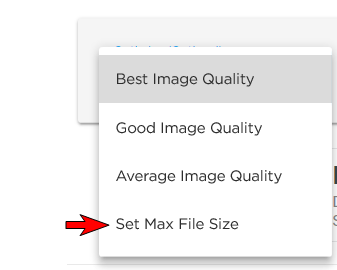
- In the 'Enter Target Size (KB)' box type in 24 (refer to the image below).

- Select the button titled 'Resize Image Now' (refer to the above).
- To save the resized image to your computer select the 'Download Image' button (refer to the image below).
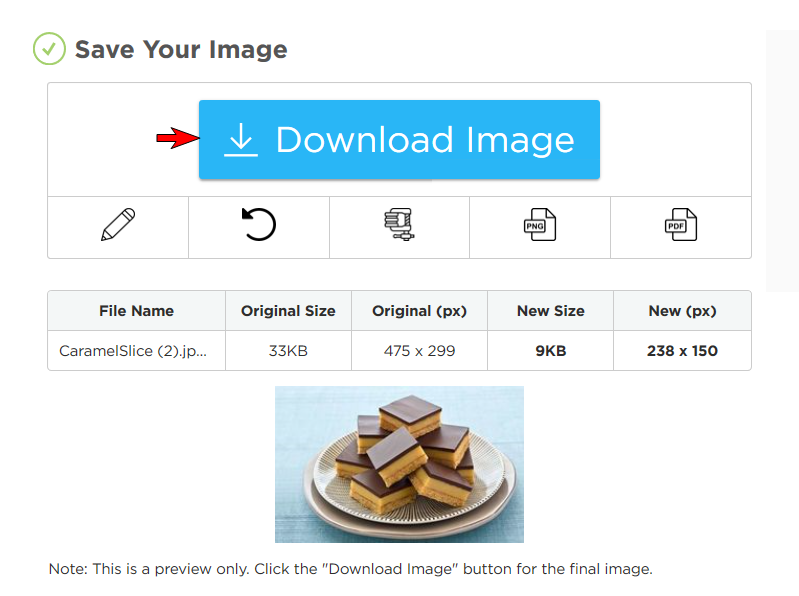
- Depending on the web browser you are using e.g. Chrome, Internet Explorer etc you will be prompted to save the image to your computer. Make sure you select 'Save As' and select the folder on your computer where you are keeping all of your recipe pictures.

Tip: to assist in the management of recipe pictures create a folder on your computer named 'Recipe Pictures' and place all of your recipe pictures in that folder. To further assist you, name your recipe pictures with the name of your recipe, capitalise each word in the file name and don't use spaces in the file name.
Example: Recipe Name: Caramel Slice
Image Name: CaramelSlice.png or Caramel-Slice.png
Note: if you select 'Save' and not 'Save As', your image will most likely be saved to a predetermined location on your computer like your 'Downloads' folder or the last folder you saved a file to. In these cases you will need to find it by checking the folders on your computer.